CSSCurrent en:Setting up an SSL Certificate
About SSL Certificates
Both private (self-created) or public (usually commercial) SSL certificates can be used. These offer the same level of security in terms of encryption. Compared to self-created SSL certificates, however, public SSL certificates offer the advantage that the issuer of the certificate, i.e. the certification authority or certificate provider, checks the ownership of your domain and confirms this in the certificate. Since a user's browser usually already trusts the public certification authority, the confirmed certificate of your domain (as long as it is valid) is also considered trustworthy.
When using a private certificate, on the other hand, browsers usually display a warning asking for verification and confirmation of the trust relationship. Since this usually deters users, obtaining and using a public certificate is strongly recommended.
Using an existing certificate / wildcard certificate
Follow these links if you already own a wildcard certificate or if you want to renew your existing certificate.
Required Tools
KeyStore Explorer
For the preparation of the certificate store ("Keystores") of your Cryptshare Server, we recommend the free Windows tool "KeyStore Explorer". With this tool, you can prepare the keystore file on your workstation to copy it to the Cryptshare server later. You can download KeyStore Explorer at http://keystore-explorer.org/downloads.html.
The tool can be used for all management tasks regarding the SSL certificates of Cryptshare Server, regardless of whether it is running on Windows or Linux.
WinSCP (only Linux-based Systems)
If you are using a Hardware Appliance, Virtual Appliance or another Linux-based Cryptshare Server, we recommend the Windows tool "WinSCP" to copy the keystore file from your workstation to the Cryptshare Server: https://winscp.net/eng/download.php#download2.
PuTTY
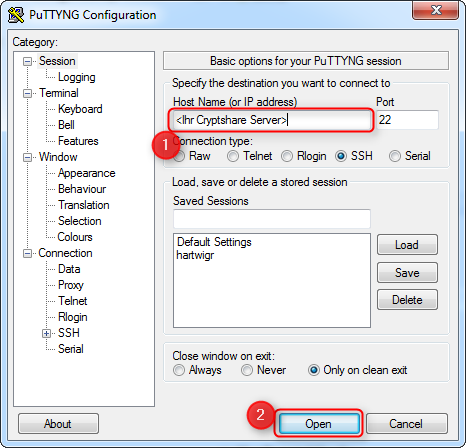
With "PuTTY", it is possible to create a SSH connection from a Windows PC to the Cryptshare Server, to work with the Linux command line (shell). PuTTY is only required for Linux-based systems (including Virtual Appliance or Hardware Appliance): http://www.putty.org/.
Generating a new Key Pair
For the creation of a public or private certificate, a key pair has to be generated first.
To do so, proceed as follows:
- Start KeyStore Explorer on your workstation.
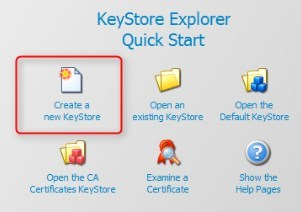
- Create a new keystore:
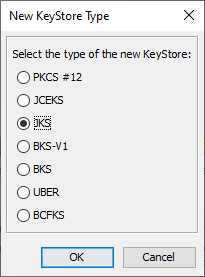
- Select "JKS" as the keystore type.
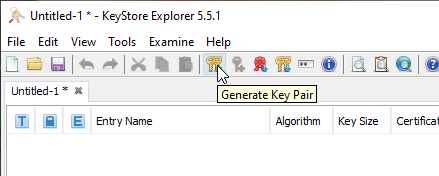
- Generate a new key pair:
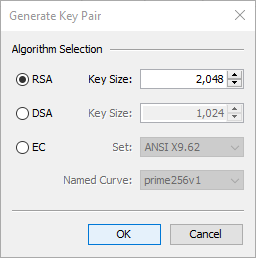
- Select "RSA" as the encryption algorithm. The required key length depends on the specifications of your certificate provider. Usually, at least 2048 bit is required.
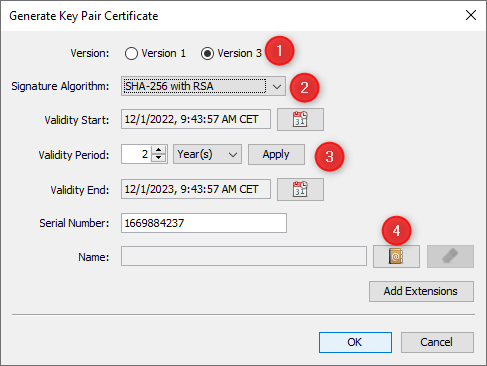
- In the following dialog, check these settings:
- "Version": "Version 3"
- "Signature Algorithm": "SHA-256 with RSA" (or better)
- "Validity Period": The period during which the subsequently generated certificate is to be recognised as valid, for example 2 years from the time of creation.
- After that, click on the icon behind the "Name" field.
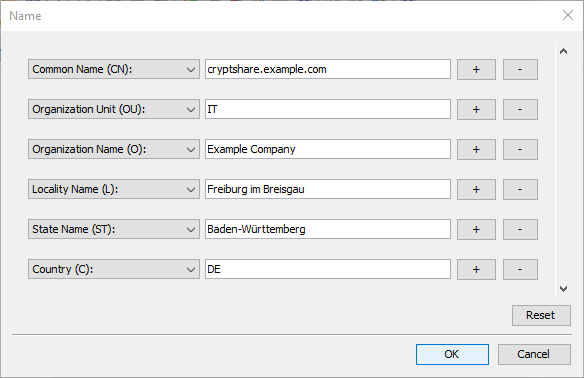
- In the "Name" dialog, enter the details of your Cryptshare Server and company.
- The Common Name (CN) must match the host name of the server as specified in the public URL (e.g. "webapp.cryptshare.com" if the URL is "https://webapp.cryptshare.com"). An incorrect entry will result in a certificate error.
- The other details should match the results of a "whois" query of the domain.
- Confirm the two dialogs with "Ok".
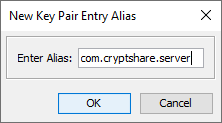
- After that, you will be asked to enter an alias:
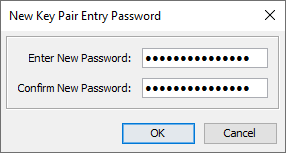
- Enter the password "CA0AZhuFM4NogQh". This is a default password that needs to be used when the system is delivered. For a description of how to change the password, please refer to Changing SSL passwords.
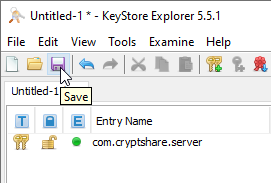
- Save the keystore to your hard disk:
- As file name, choose "keystore".
- A password is also required to protect the keystore. Use the same password here as for the certificate ("CA0AZhuFM4NogQh").
To use a Public SSL Certificate:
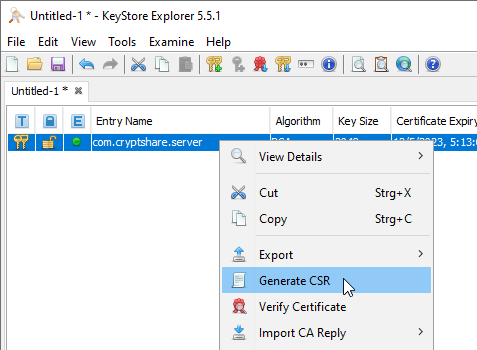
- In the main screen of KeyStore Explorer, right-click on the entry you have just created.
- Choose "Generate CSR" to generate a so-called "Certificate Signing Request" (CSR) for your Cryptshare Server.
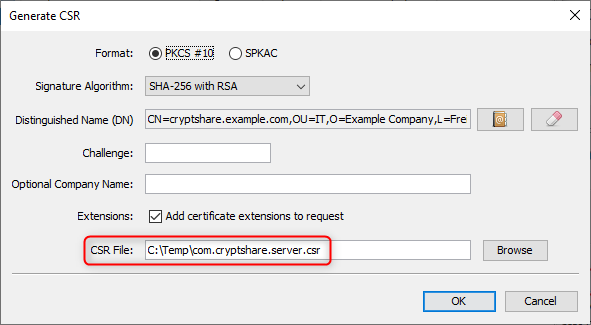
- In the following dialog, select the destination path for the CSR file and, if necessary, adjust the options according to the specifications of your certificate provider.
- A public certificate can be issued by a certificate provider now. To do this, please provide the CSR file you have just created. The procedure for this varies depending on the provider.
- As soon as your certificate provider issued a certificate, you can proceed with Installing a Public Certificate in the Keystore of the Cryptshare Server.
To use a Private SSL Certificate:
During the generation of the key pair, a certificate has already been created. Proceed with Installing a Public Certificate in the Keystore of the Cryptshare Server.
Once you have received the public certificate from the certificate provider, you must then add it to the keystore of the Cryptshare server. Please proceed as follows:
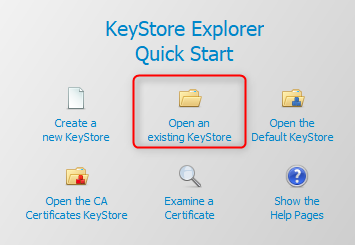
- Open the KeyStore Explorer.
- Open the keystore file "keystore":
- Enter "CA0AZhuFM4NogQh" as password. This is a default password that needs to be used when the system is delivered. For a description of how to change the password, please refer to Changing SSL passwords.
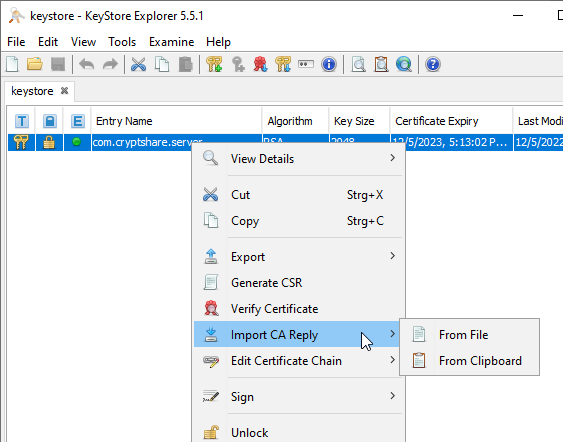
- Right-click on the "com.cryptshare.server" entry.
- Choose "Import CA Reply":
- Provide the certificate data using "From File" or "From Clipboard" depending on how the certificate has been provided. Enter the password "CA0AZhuFM4NogQh" again.
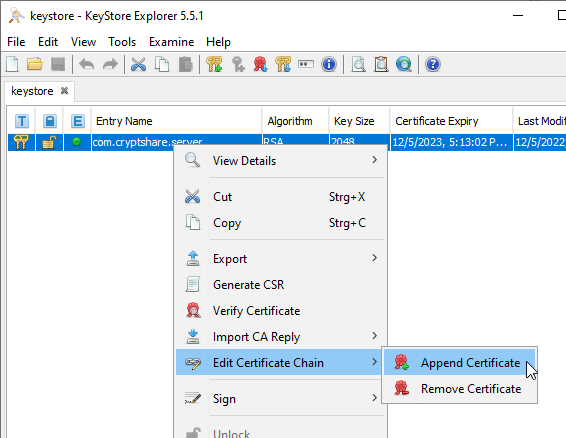
- If necessary, complete the certificate chain up to and including the root certificate with the following steps.
- Please note that if the certificate chain is incomplete, a security message may still appear in some browsers requiring manual intervention. Therefore, make sure that all intermediate certificates and the root certificate are added to the certificate chain in the correct order. 1. requested server certificate, 2. intermediate certificates, 3. root certificate. You can obtain the required information and files from your certificate provider.
- Save the keystore.
- Proceed with the following secting.
Linux-based Systems (including Hardware Appliance and Virtual Appliance)
- Start "WinSCP"
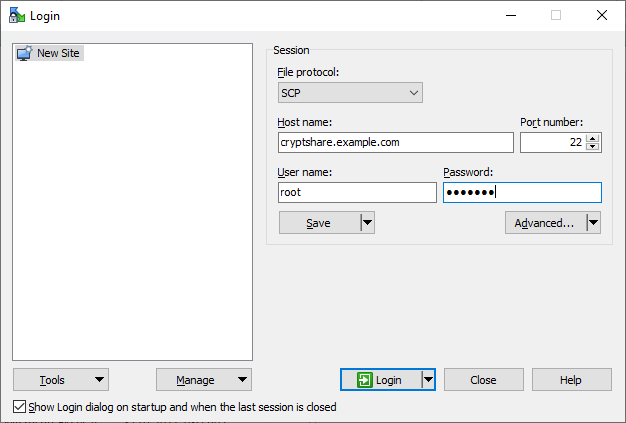
- In the login dialog, enter the connection details:
- "File Protocol:" SCP
- "Host name:" Host name or IP address of the Cryptshare Server.
- "User name:" The user name with which the connection is to be made. On Hardware Appliance and Virtual Appliance, this is "root".
- "Password:" The corresponding password. During the delivery of a Hardware Appliance or Virtual Appliance, this has been provided.
- Click on "Login" to log in to your Cryptshare Server and establish the connection.
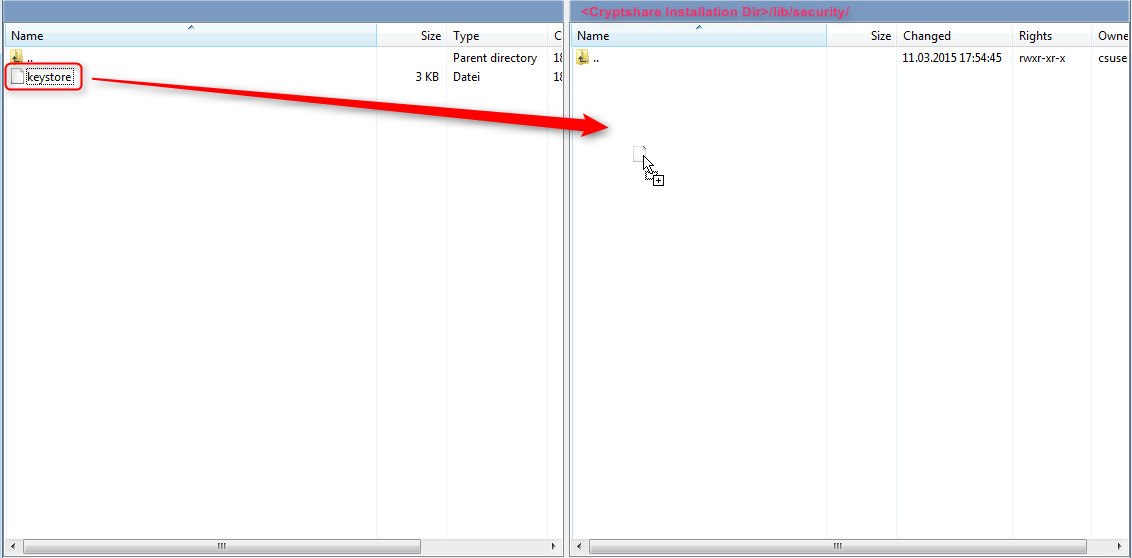
- On the right-hand side, change to the "<Cryptshare Installation Directory>/lib/security" directory. On Hardware Appliances, Virtual Appliances and other installations made with the RPM package, this is "/opt/cryptshare-3/lib/security". Then copy the keystore file from your workstation into this directory.
The keystore is on the Cryptshare server now. At this point, you have several possibilities to restart the Cryptshare service:
Using the administration interface:
- Open the administration interface of your Cryptshare Server in a browser (https://<Your Cryptshare Server host name>:8080).
- Login with an administrator account.
- Open the action menu in the upper right corner and click on "Restart".
Using the Linux shell:
- Connect to the Linux shell of the Cryptshare Server via PuTTY.
- Enter "root" at "login as", to connect as root user.
- The system then requests the user's password. During the delivery of a Hardware Appliance or Virtual Appliance, this has been provided. Please note that when entering the password, it is not displayed on the screen and no placeholders (*) are displayed for the characters entered.
- Restart the Cryptshare service:
systemctl restart cryptshare (use rccryptshare restart up to and including v.7.1)
Windows-based Systems
- Save the previously created keystore in the subdirectory "lib/security" of the installation directory.
- Restart the service "CryptshareService".
