CKB:Configuring Postfix mail server: Unterschied zwischen den Versionen
Aus Cryptshare Documentation
(Imported from text file) |
Keine Bearbeitungszusammenfassung |
||
| Zeile 10: | Zeile 10: | ||
== Solution: == | == Solution: == | ||
It is possible to change the Postfix configuration on the Cryptshare appliance. | It is possible to change the Postfix configuration on the Cryptshare appliance. | ||
1. login as 'root' on your appliance | |||
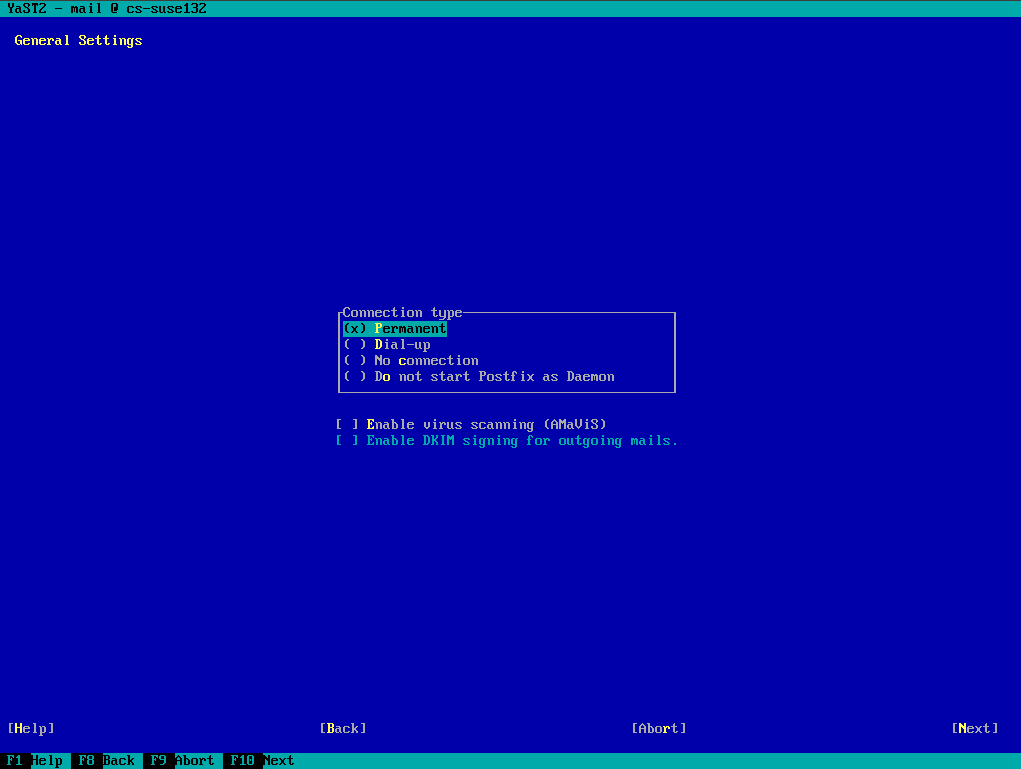
2. run the command 'yast mail'= | |||
[[File:7667748.png]] = | |||
3. select F10 Next | |||
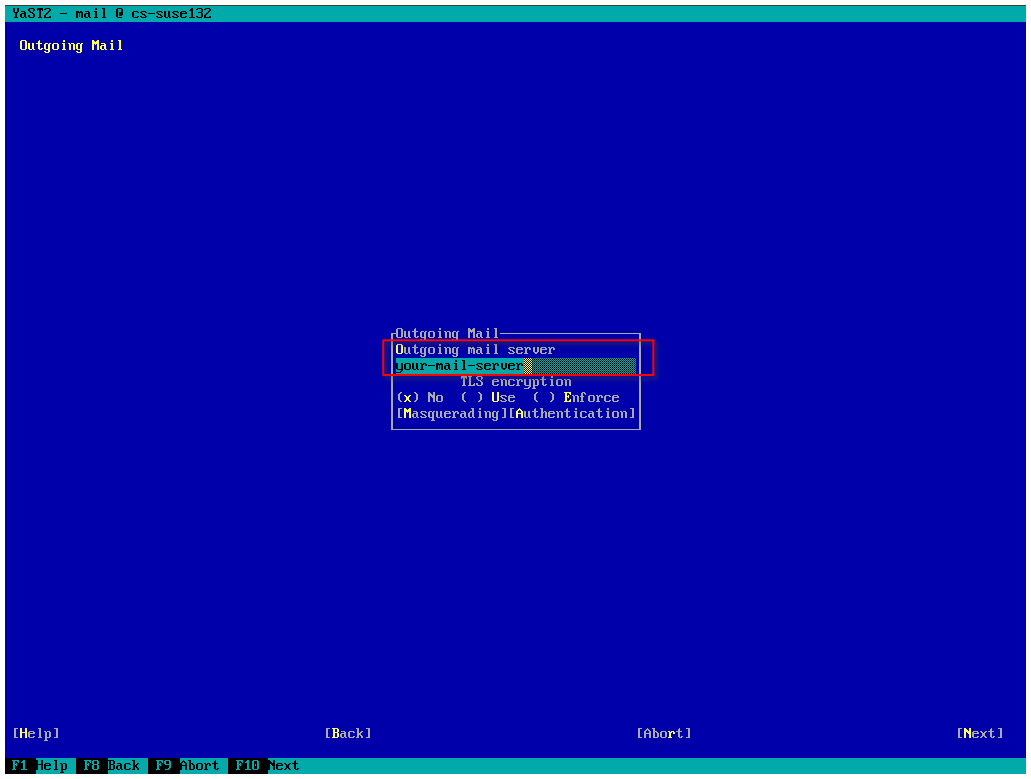
4. change Outgoing mail server (IP or address can be used) | |||
[[File:7667749.png]] | [[File:7667749.png]] | ||
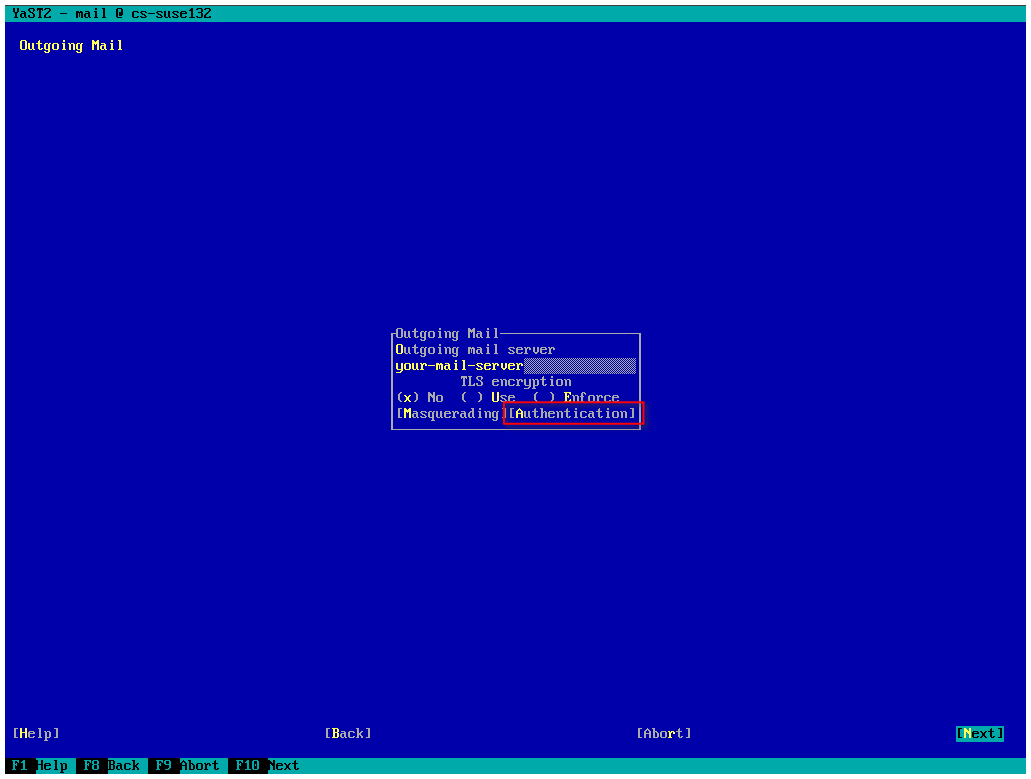
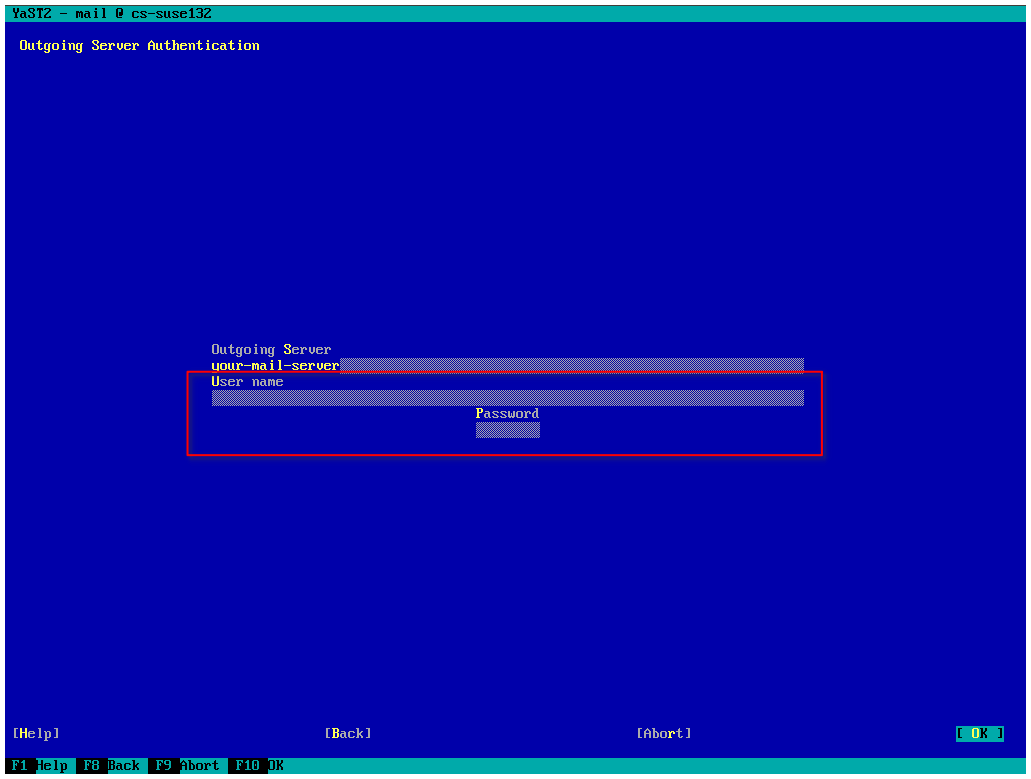
5. if needed, add the authentication credentials | |||
[[File:7667750.png]][[File:7667751.png]] | [[File:7667750.png]][[File:7667751.png]] | ||
6. select F10 OK | |||
7. select F10 Next | |||
[[File:7667752.png]] | [[File:7667752.png]] | ||
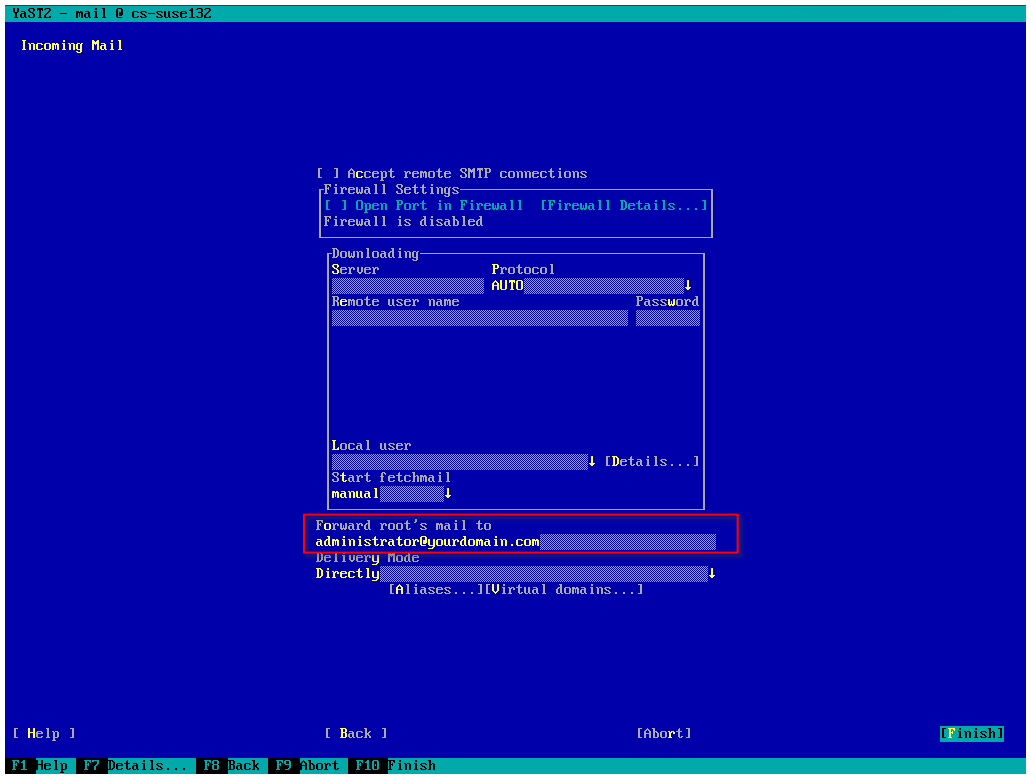
8. enter the administrator email address. Multiple addresses may be added separated by commas. | |||
9. select F10 Finish | |||
----- | ----- | ||
Aktuelle Version vom 14. Januar 2022, 14:38 Uhr
Applies to:
All versions of Cryptshare Appliance
Purpose:
Configuring the local Postfix mail server (e.g. the address of the relay server or administrator email address)
Solution:
It is possible to change the Postfix configuration on the Cryptshare appliance.
1. login as 'root' on your appliance
2. run the command 'yast mail'=
3. select F10 Next
4. change Outgoing mail server (IP or address can be used)
5. if needed, add the authentication credentials
6. select F10 OK
7. select F10 Next
8. enter the administrator email address. Multiple addresses may be added separated by commas.
9. select F10 Finish
