CKB:Configuring network card: Unterschied zwischen den Versionen
(Imported from text file) |
Keine Bearbeitungszusammenfassung |
||
| Zeile 14: | Zeile 14: | ||
== Solution: == | == Solution: == | ||
You can change the network settings on the pre-configured appliance: | You can change the network settings on the pre-configured appliance: | ||
1. log in as '''root''' on the Cryptshare Appliance | |||
2. type '''yast network''' in the console | |||
[[File:74384755.png]] | [[File:74384755.png]] | ||
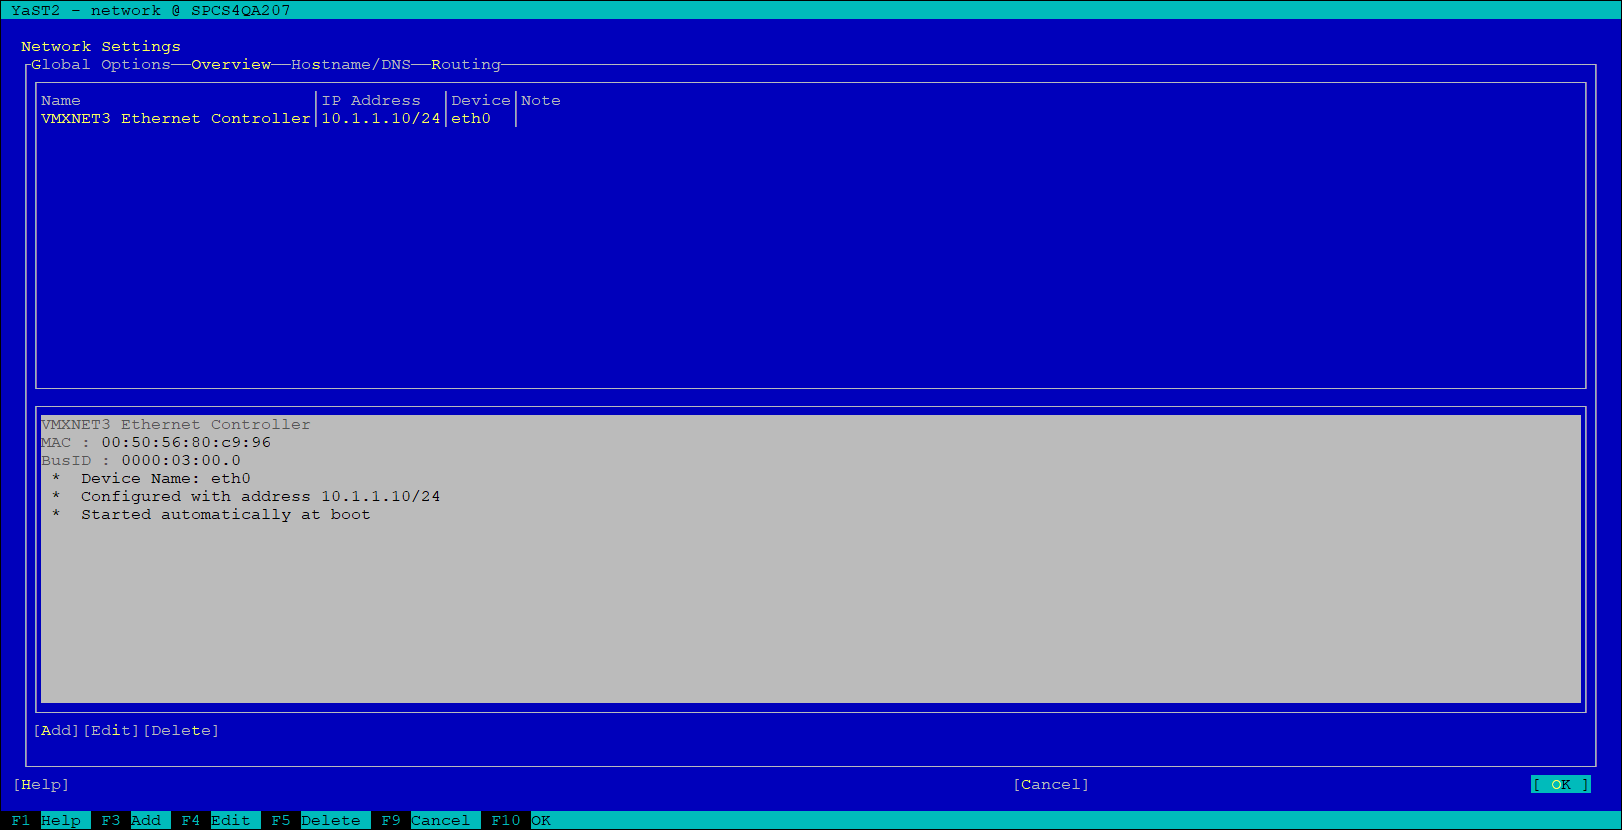
3. select '''F10''' ('''Launch''') | |||
[[File:74384756.png]] | [[File:74384756.png]] | ||
4. select '''F4''' ('''Edit''') | |||
5. enter '''IP Address''', '''Subnet Mask''' (XXX.XXX.XXX.XXX or /XX) and the '''Hostname''' using '''Fully Qualified Domain Name (FQDN)''' format | |||
[[File:74384757.png]] | [[File:74384757.png]] | ||
6. select '''F10''' ('''Next''') | |||
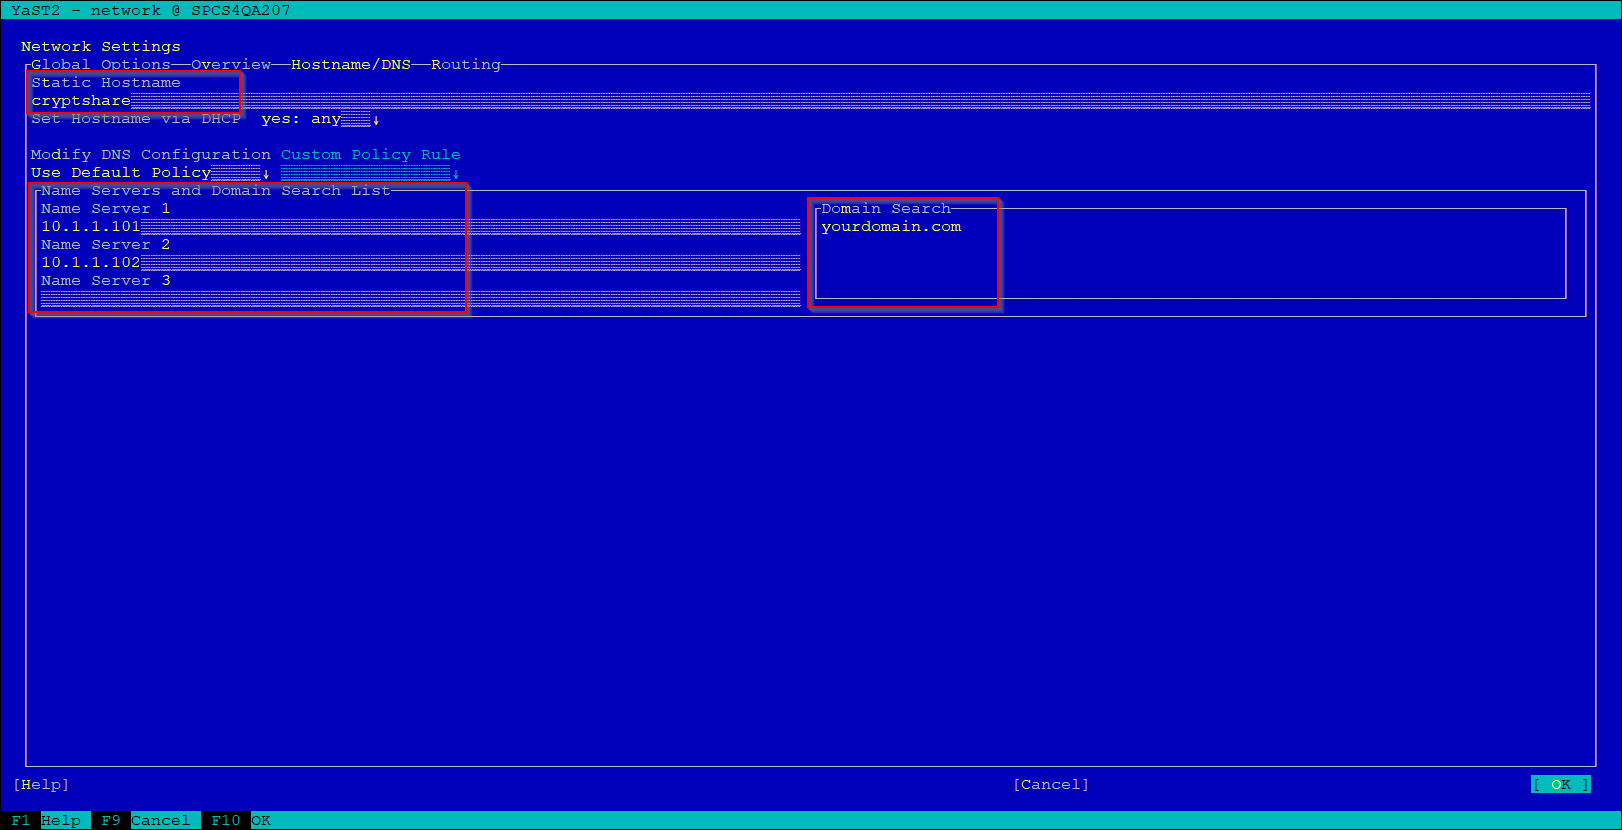
7. go to '''Hostname/DNS''' using tab key or left Alt + S | |||
8. set '''Static Hostname''', IP Addresses of your '''DNS''' and the '''Domain Search List''' | |||
{{NoteBox|title=Tip|content=Static Hostname should be the short name in FQDN entry from previous step! <br />For example, if the Hostname was '''cryptshare.yourdomain.com''', than enter '''cryptshare''' as Static Hostname. | {{NoteBox|title=Tip|content=Static Hostname should be the short name in FQDN entry from previous step! <br />For example, if the Hostname was '''cryptshare.yourdomain.com''', than enter '''cryptshare''' as Static Hostname. | ||
}} | }} | ||
[[File:74384758.png]] | [[File:74384758.png]] | ||
9. go to the tab Routing using tab key or Alt + R | |||
10. add new route | |||
11. set '''Gateway''' IP address and select device from the list (commonly '''eht0''') | |||
[[File:74384759.png]] | [[File:74384759.png]] | ||
12. select '''F10''' ('''OK''')multiple times to save changes and exit yast | |||
----- | ----- | ||
Aktuelle Version vom 14. Januar 2022, 12:37 Uhr
Applies to:
Purpose:
This article describes how to change the network settings on Cryptshare appliances Sometimes it is nessecary to move or change the network settings (e.g. IP address, DNS address etc.) on the appliance.
- Updating the Appliance Version
- Implementing a new appliance (from a clone)
- moving the appliance into a different Network
Solution:
You can change the network settings on the pre-configured appliance:
1. log in as root on the Cryptshare Appliance
2. type yast network in the console
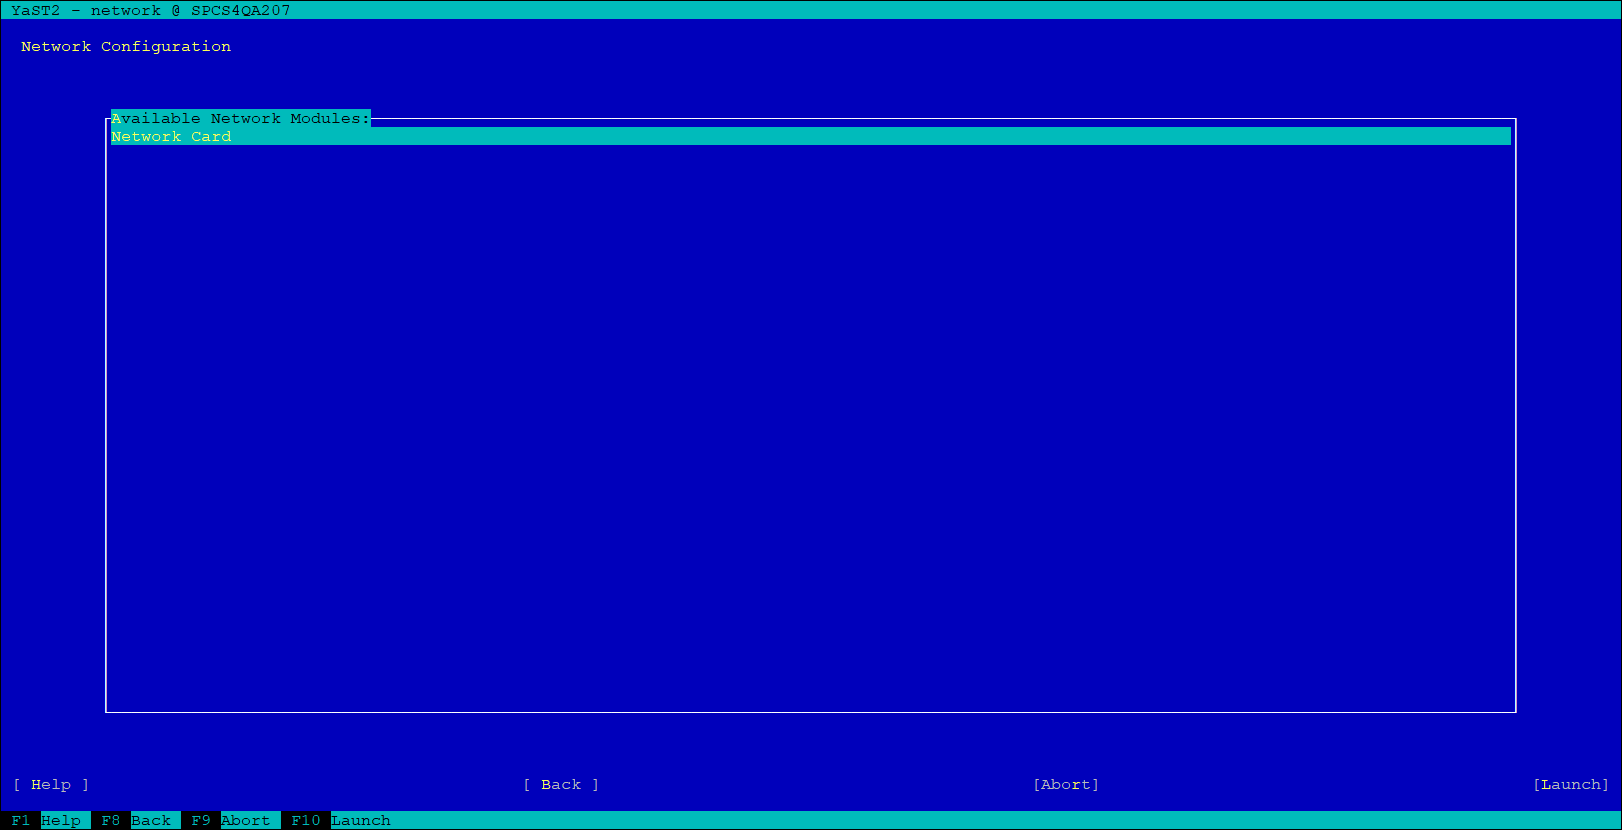
4. select F4 (Edit)
5. enter IP Address, Subnet Mask (XXX.XXX.XXX.XXX or /XX) and the Hostname using Fully Qualified Domain Name (FQDN) format
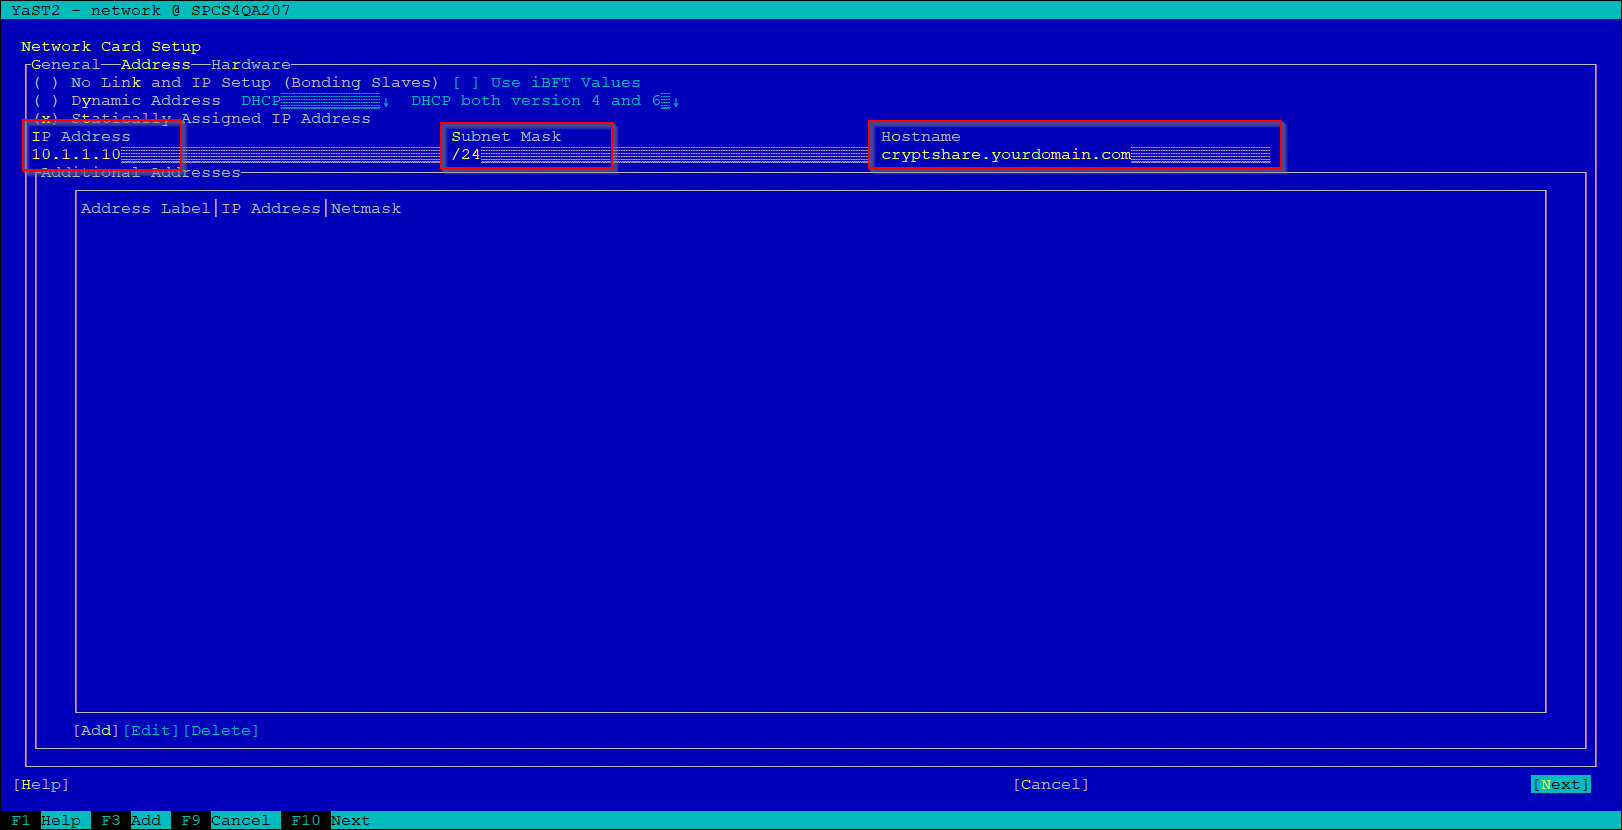
6. select F10 (Next)
7. go to Hostname/DNS using tab key or left Alt + S
8. set Static Hostname, IP Addresses of your DNS and the Domain Search List
For example, if the Hostname was cryptshare.yourdomain.com, than enter cryptshare as Static Hostname.
9. go to the tab Routing using tab key or Alt + R
10. add new route
11. set Gateway IP address and select device from the list (commonly eht0)
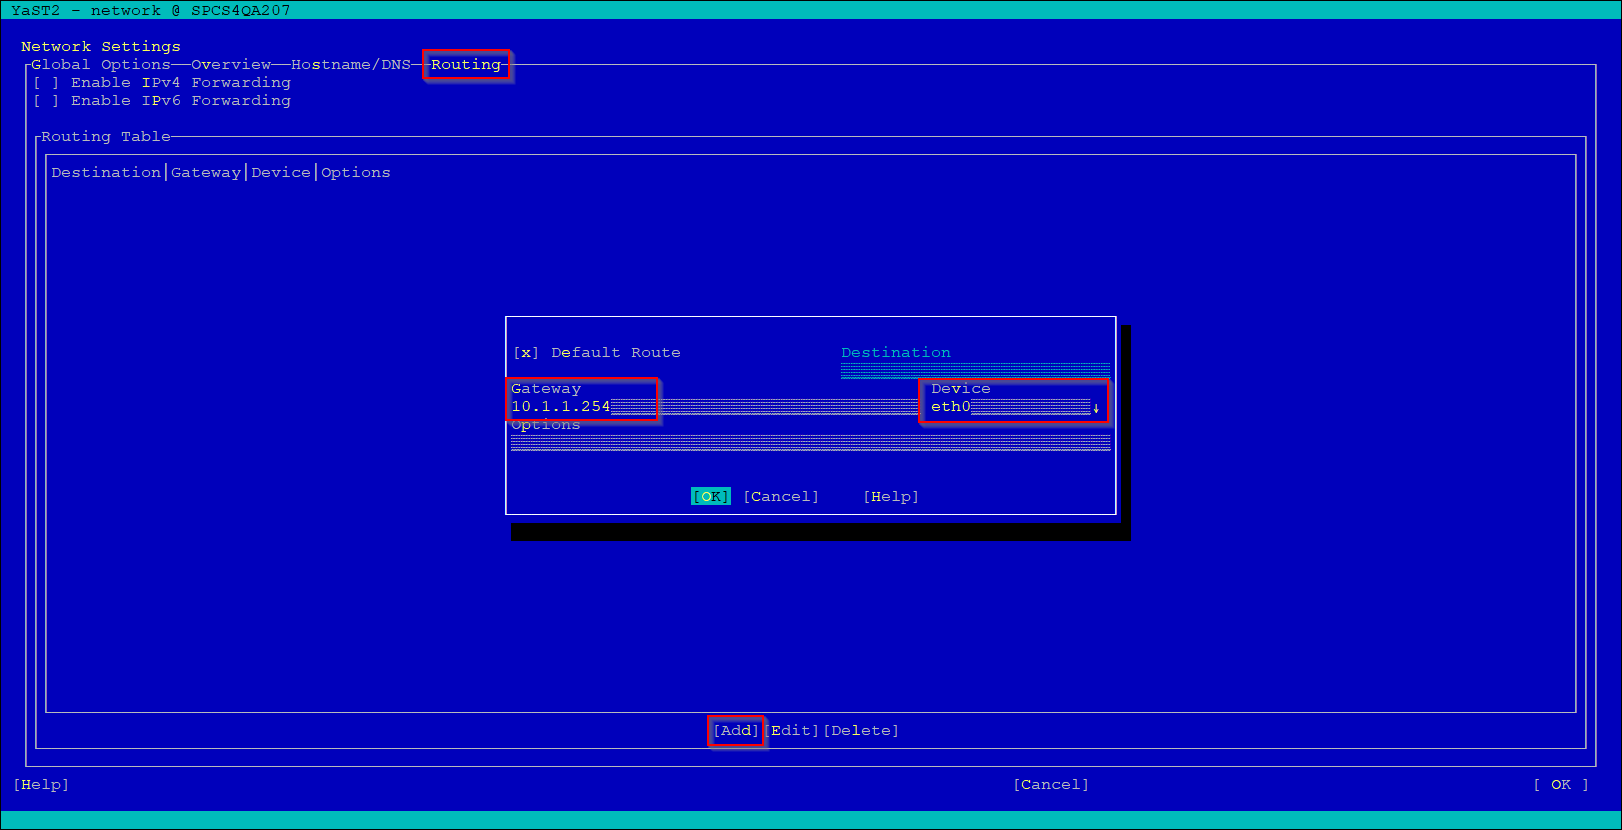
12. select F10 (OK)multiple times to save changes and exit yast
