RESTAPI:Removing the Application Logo from email templates
Applies to
Purpose
This article shows an example for one of the possibilites for modifying Cryptshare E-Mail Templates as described in the Cryptshare Server Manual. In this case, the email template is changed so that the Cryptshare logo is removed from the email notifications.
* the table-layout: removing single cells can break the layout, removing complete rows is possible
* the velocity code: Templates are not pure HTML but also contain application logic (i.e. placeholders starting with a '$'-character). This code should be kept intact.
Step-by-step guide
1. Download the language package you want to change. Assuming you want to change the server templates, the language packages can be found here.
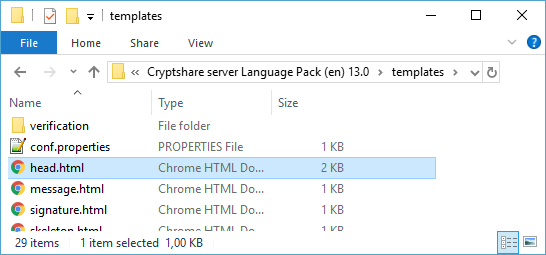
2. Unpack the zip file and navigate to the subdirectory 'templates'.
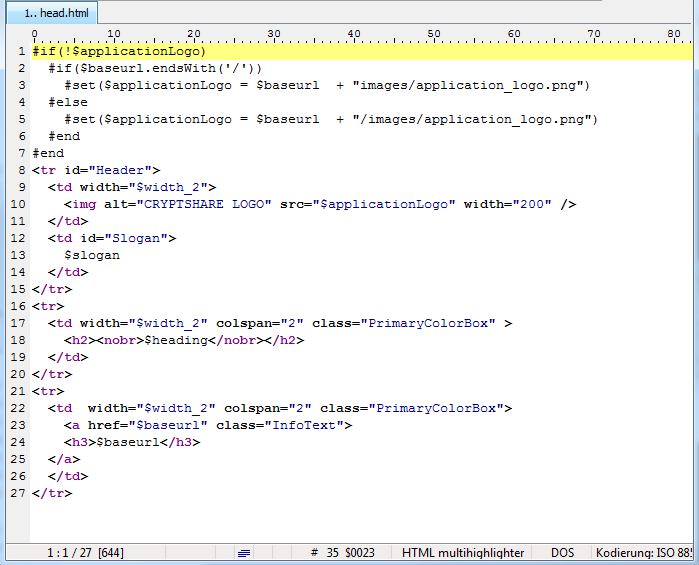
3. Open the file 'head.html' with a text file editor supporting UTF-8 encoding, for instance notepad++ or PSPad
4. Remove the if-else block regarding '$applicationLogo' (Lines 1-7)
Original File

#if(!$applicationLogo)
     #if($baseurl.endsWith('/'))
         #set($applicationLogo = $baseurl  + "images/application_logo.png")
     #else
         #set($applicationLogo = $baseurl  + "/images/application_logo.png")
     #end
 #end
 <tr id="Header">
     <td width="$width_2">
         <img alt="CRYPTSHARE LOGO" src="$applicationLogo" width="200" />
     </td>
     <td id="Slogan">
         $slogan
     </td>
 </tr>
 <tr>
     <td width="$width_2" colspan="2" class="PrimaryColorBox" >
         <h2><nobr>$heading</nobr></h2>
     </td>
 </tr>
 <tr>
     <td  width="$width_2" colspan="2" class="PrimaryColorBox">
         <a href="$baseurl" class="InfoText">
         <h3>$baseurl</h3>
     </a>
     </td>
 </tr>
File without if-else block (Changed file)

<tr id="Header">
     <td width="$width_2">
         <img alt="CRYPTSHARE LOGO" src="$applicationLogo" width="200" />
     </td>
     <td id="Slogan">
         $slogan
     </td>
 </tr>
 <tr>
     <td width="$width_2" colspan="2" class="PrimaryColorBox" >
         <h2><nobr>$heading</nobr></h2>
     </td>
 </tr>
 <tr>
     <td  width="$width_2" colspan="2" class="PrimaryColorBox">
         <a href="$baseurl" class="InfoText">
         <h3>$baseurl</h3>
     </a>
     </td>
 </tr>
5. Replace the complete img-tag with ' ' (Line 10 in unchanged file)
Original File

#if(!$applicationLogo)
     #if($baseurl.endsWith('/'))
         #set($applicationLogo = $baseurl  + "images/application_logo.png")
     #else
         #set($applicationLogo = $baseurl  + "/images/application_logo.png")
     #end
 #end
 <tr id="Header">
     <td width="$width_2">
         <img alt="CRYPTSHARE LOGO" src="$applicationLogo" width="200" />
     </td>
     <td id="Slogan">
         $slogan
     </td>
 </tr>
 <tr>
     <td width="$width_2" colspan="2" class="PrimaryColorBox" >
         <h2><nobr>$heading</nobr></h2>
     </td>
 </tr>
 <tr>
     <td  width="$width_2" colspan="2" class="PrimaryColorBox">
         <a href="$baseurl" class="InfoText">
         <h3>$baseurl</h3>
     </a>
     </td>
 </tr>
Changed File

<tr id="Header">
     <td width="$width_2">

     </td>
     <td id="Slogan">
         $slogan
     </td>
 </tr>
 <tr>
     <td width="$width_2" colspan="2" class="PrimaryColorBox" >
         <h2><nobr>$heading</nobr></h2>
     </td>
 </tr>
 <tr>
     <td  width="$width_2" colspan="2" class="PrimaryColorBox">
         <a href="$baseurl" class="InfoText">
         <h3>$baseurl</h3>
     </a>
     </td>
 </tr>
6. Repeat step 3 to 5 for each 'head.html' file in the subfolders of the directory 'templates'. (For the default package this is only required for 'templates/recipient') 7. Save the changes and exit the editor.
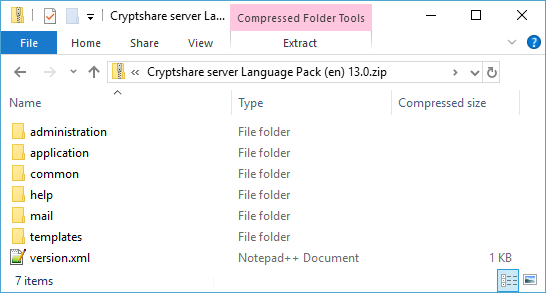
8. Pack the edited language package into a zip file. Make sure to retain the original structure as shown in the documentation.
9. Install the language package on your server via the Administration Interface.


